
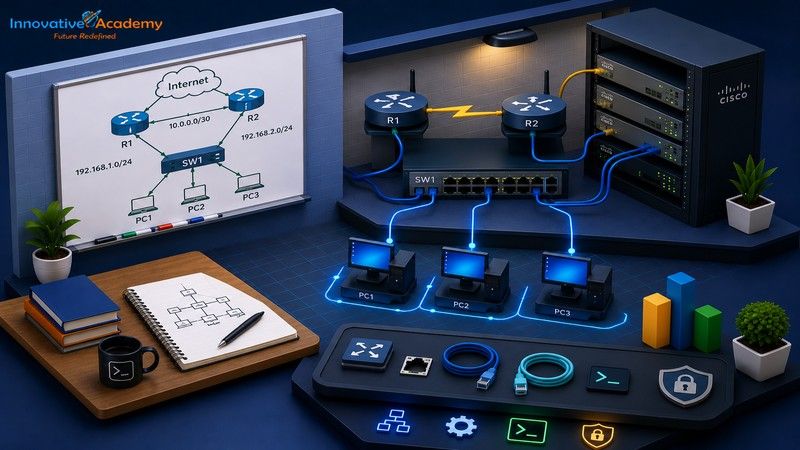

How I Built a Complete CCNA Practice Lab From Old Hardware
Table of Contents
- Why Build a CCNA Lab at Home?
- Can an Old Laptop Handle a CCNA Lab?
- What You Need Before Starting
- Step 1: Prepare the Old Laptop
- Step 2: Install the Right Networking Tools
- Step 3: Build Your First Virtual Network
- CCNA Labs You Can Practice
- 5 Networking Projects to Try
- How to Practice Troubleshooting
- Common Problems With an Old Laptop Lab
- How to Get More From Your Home Lab
- When Should You Buy Physical Networking Equipment?
- Is a Home Lab Enough to Learn CCNA?
- Conclusion
- Frequently Asked Questions
Old hardware doesn't have to become electronic waste. With the right tools, an older computer can become a surprisingly useful learning environment for aspiring network engineers.
Instead of spending a large amount of money on physical routers and switches, you can use an old computer to create a virtual networking environment. With tools such as Cisco Packet Tracer, GNS3, virtualization software, and Linux, you can practice many of the networking concepts required for CCNA.
You can build networks, configure devices, make mistakes, troubleshoot problems, and start again without worrying about breaking a production network.
In this guide, we'll show you how to turn old hardware into your own CCNA practice lab.
Why Build a CCNA Lab at Home?
There is a big difference between reading about networking and actually configuring a network. A textbook can explain what a VLAN is. A video can show you how routing works. But when you create the configuration yourself and suddenly lose connectivity, you have to think like a network engineer.
That's where a home lab becomes valuable.
A CCNA lab gives you a safe environment where you can:
- Configure IP addresses
- Practice subnetting
- Create VLANs
- Configure trunk ports
- Practice routing
- Configure DHCP
- Learn OSPF
- Test network connectivity
- Use troubleshooting commands
- Design network topologies
- Break configurations and fix them
And the best part? You can do much of this work without buying a rack full of networking equipment.
Can an Old Laptop Handle a CCNA Lab?
It depends on what you mean by "old." You don't need a high-end gaming laptop to start learning CCNA. For basic network simulation, an older computer can be perfectly useful.
As you move toward more advanced emulation and virtualization, however, CPU cores, RAM, storage, and hardware virtualization become increasingly important.
Before starting, check for:
- 64-bit processor
- 4 GB RAM or more
- SSD if possible
- Hardware virtualization support
- Working Ethernet or Wi-Fi adapter
- Enough free storage
If your laptop has 8 GB or 16 GB RAM, you have considerably more flexibility for virtualization. If it only has 4 GB, start with lightweight simulations and smaller labs.
What You Need Before Starting
You don't need to install every networking tool available. Start with the basics and add more tools as your skills improve.
| Requirement | Purpose |
|---|---|
| Old computer | Your main lab machine |
| Internet connection | Download software and updates |
| Cisco Packet Tracer | Network simulation |
| GNS3 | Network emulation and advanced labs |
| VirtualBox/VMware | Running virtual machines |
| Linux VM | Server and networking practice |
| Ethernet cable | Optional physical networking practice |
The important thing is to start small. Installing ten different tools won't make you a better network engineer. Building and troubleshooting ten useful labs will be much more valuable.
Step 1: Prepare the Old Laptop
Before turning your old computer into a lab machine, give it a little maintenance.
Start by removing unnecessary applications and files. If the operating system is extremely slow, consider reinstalling it or using a lightweight operating system appropriate for your hardware.
Check Your RAM
Open Task Manager on Windows and check your installed memory. If you're planning to run multiple virtual machines, more RAM will make a noticeable difference.
Check Your CPU
Look at:
- Processor model
- Number of cores
- Virtualization support
Check Your Storage
If your old computer still has a mechanical hard drive, replacing it with an SSD can make the entire machine feel significantly faster.
Check Virtualization
If you plan to use virtual machines, make sure hardware virtualization is enabled in BIOS/UEFI.
Depending on your processor, you may see settings such as:
- Intel VT-x
- Intel Virtualization Technology
- AMD-V
- SVM Mode
Step 2: Install the Right Networking Tools
Now your old computer is ready for the software that will turn it into a networking lab.
Start With Cisco Packet Tracer
For beginners, Packet Tracer is an excellent starting point because you can create network topologies without needing a collection of physical Cisco devices.
You can create something as simple as:
PC → Switch → Router
and gradually build more complicated networks.
Practice:
- IP addressing
- Subnetting
- Switching
- VLANs
- Routing
- DHCP
- Basic troubleshooting
If you're starting your networking journey, you can also explore CCNA training in Bangalore to combine structured instruction with practical lab work.
Move to GNS3
GNS3 is designed for creating virtual and emulated network environments. It can be used to configure, test, and troubleshoot virtual and real networks.
GNS3 can run simple topologies directly on a laptop, while more advanced environments can use the GNS3 VM.
What About EVE-NG?
EVE-NG is another option for building virtual networking environments. It can be particularly useful once you want to experiment with larger and more complex network topologies.
However, don't make the mistake of thinking you need EVE-NG on your first day of CCNA preparation. Start simple.
Step 3: Build Your First Virtual Network
Now let's build your first network.
PC1 → Switch → PC2
Assign IP addresses to both computers. For example:
- PC1: 192.168.1.10
- PC2: 192.168.1.20
Use the appropriate subnet mask. Then test connectivity.
If the two devices can communicate, you've successfully created your first basic network.
But don't stop there. Add a router.
PC1 → Switch → Router → Switch → PC2
Create two different networks:
- Network 1: 192.168.10.0/24
- Network 2: 192.168.20.0/24
Now configure routing between them. This simple exercise introduces an important networking concept: different networks require routing to communicate.
CCNA Labs You Can Practice
Lab 1: IPv4 Addressing
Practice:
- Network addresses
- Host addresses
- Subnet masks
- Default gateways
- Broadcast addresses
Don't just memorize the concepts. Create networks and assign the addresses yourself.
Lab 2: Subnetting
Take 192.168.1.0/24 and divide it into smaller networks.
Calculate:
- Number of subnets
- Hosts per subnet
- Network address
- First usable address
- Last usable address
- Broadcast address
Then use your calculated subnets inside your virtual topology. This turns subnetting from a theoretical exercise into something practical.
Lab 3: VLANs
Create two departments:
- VLAN 10 — HR
- VLAN 20 — IT
Connect several PCs to a switch. Assign the appropriate switch ports to each VLAN. Then test communication.
Lab 4: Trunking
Connect two switches. Configure a trunk link between them. Then create the same VLANs on both switches.
Test whether devices in the same VLAN can communicate across the switches.
Lab 5: Inter-VLAN Routing
Create:
- VLAN 10 → HR
- VLAN 20 → IT
Configure routing between the VLANs. This gives you practical experience with communication between separate Layer 2 networks.
Lab 6: DHCP
Configure a DHCP service. Instead of manually assigning IP addresses to every client, allow your network devices to receive their addresses automatically.
Then verify:
- IP address
- Subnet mask
- Default gateway
- DNS information
Lab 7: Static Routing
Create three routers:
R1 → R2 → R3
Give each router different networks. Configure static routes. Then test connectivity from one end of the network to the other.
Lab 8: OSPF
Once static routing makes sense, move into dynamic routing. Create several routers and configure OSPF.
Then shut down one connection and observe what happens. This is where networking starts becoming much more interesting.
5 Networking Projects to Try
Instead of completing isolated labs forever, start building complete projects.
Project 1: Small Office Network
Create an office with HR, finance, IT, and management. Give each department its own VLAN. Configure routing and appropriate addressing.
Project 2: Two-Branch Company
Create:
Head Office → WAN → Branch Office
Configure routers and routing between the locations. Try to make both offices communicate.
Project 3: Network With a Failure
Create multiple network paths. Then intentionally disconnect one path.
Ask yourself: What happens to connectivity? Then troubleshoot the problem.
Project 4: Home Network
Recreate your own home network virtually. Include a router, switch, wireless clients, IoT devices, and a guest network. Then design an IP addressing scheme.
Project 5: Complete Mini Enterprise
Once you're comfortable, combine everything.
Build a small company network containing multiple VLANs, multiple switches, multiple routers, DHCP, routing, a server network, a management network, and a guest network.
Now your old hardware isn't just sitting unused. It has become your networking playground.
How to Practice Troubleshooting
This may be the most important part of your home lab. Don't always build perfect networks. Sometimes deliberately break them.
For example:
Problem: PC1 can't communicate with PC2.
What would you check?
- Is the cable or virtual link connected?
- Is the interface up?
- Is the IP address correct?
- Is the subnet mask correct?
- Is the default gateway correct?
- Is the VLAN correct?
- Is the trunk configured?
- Is a route missing?
- Is the routing table correct?
This process teaches you how to think. A network engineer isn't valuable simply because they know commands. They're valuable because they can find and solve problems.
Common Problems With an Old Laptop Lab
Slow Performance
If your laptop becomes slow when running virtual machines, reduce the number of active devices. Don't try to run a 30-device topology on a machine that struggles with two virtual machines.
Not Enough RAM
RAM is often one of the biggest limitations in virtualization. Close unnecessary applications and allocate resources carefully.
Limited Storage
Virtual machines and appliance images can consume significant storage. An SSD with additional free space can make the lab much more practical.
Overheating
Old laptops may have dusty cooling systems or worn thermal components. Monitor temperatures when running resource-intensive labs.
Virtualization Disabled
If virtual machines aren't working correctly, check BIOS/UEFI virtualization settings.
How to Get More From Your Home Lab
Don't treat your lab like a collection of exercises. Treat it like a personal networking project.
Use this learning cycle:
Learn → Build → Break → Troubleshoot → Rebuild
For example:
Learn VLANs → Build two VLANs → Break the configuration → Troubleshoot → Fix it → Build it again from scratch
This approach helps you remember concepts much better than simply watching tutorials.
Keep a Lab Journal
For every project, record:
- Objective
- Network diagram
- IP addressing
- Configuration
- Problems
- Troubleshooting steps
- Final solution
Over time, you'll have your own networking reference guide.
When Should You Buy Physical Networking Equipment?
You don't need physical Cisco hardware immediately. A virtual lab can be very helpful.
But physical equipment can eventually give you experience with things that simulation can't completely reproduce.
- Console cables
- Physical Ethernet connections
- Interface LEDs
- Device boot processes
- Physical port failures
- Cable problems
- Hardware replacement
Once you have a strong understanding of networking, you can consider adding used routers and switches to your lab.
But don't let the cost of hardware stop you from starting. Your old computer is enough to begin.
If you'd rather get guided access to real Cisco equipment before investing in your own gear, Innovative Academy's CCNA training provides hands-on networking practice that can complement your home lab.
Is a Home Lab Enough to Learn CCNA?
A home lab is an excellent supplement to CCNA preparation, but it shouldn't be your only learning resource.
You also need to understand the underlying networking concepts.
A suitable approach is:
- Theory → Understand the concept
- Lab → Configure it
- Troubleshooting → Break and fix it
- Revision → Explain what you did
- Practice → Build another topology
This combination is much more effective than relying entirely on memorization.
If you want a structured learning path alongside your home lab, you can explore Innovative Academy's networking and IT programs.
Conclusion
Old hardware sitting unused doesn't have to become electronic waste. With the right software and a structured learning plan, you can turn it into a practical CCNA home lab.
Start with a simple topology. Learn IP addressing. Move to switching. Practice VLANs. Learn routing. Configure DHCP. Explore OSPF. Then start creating your own network projects.
The goal isn't to build the biggest lab. The goal is to build a lab you actually use.
You don't need an expensive rack or dozens of physical devices to start developing networking skills. Occasionally, all you need is some old hardware, a few good tools, and the willingness to experiment.
Every time you configure a network, break something, troubleshoot it, and fix it, you're taking another step toward thinking like a network engineer.
If you want expert guidance, structured labs, and placement support to go along with your home lab practice, explore CCNA training at Innovative Academy.
Frequently Asked Questions
Can I Build a CCNA Lab With Old Hardware?
Yes. An old computer can be used for network simulation and, depending on its specifications, virtualization and network emulation. Start with lightweight labs and increase complexity gradually.
How Much RAM Do I Need for a CCNA Home Lab?
For basic simulation, less RAM may be sufficient. More RAM becomes important when running multiple virtual machines or larger GNS3/EVE-NG environments.
Do I Need a Physical Cisco Router for CCNA?
No. You can start with software-based labs. Physical equipment can be added later for additional hands-on experience.
Is GNS3 Free?
GNS3 is open-source and free software. It provides a platform for emulating, configuring, testing, and troubleshooting virtual and real networks.
Should Beginners Use Packet Tracer or GNS3?
For many beginners, starting with a simple simulator such as Packet Tracer is easier. GNS3 can be introduced as you become more comfortable and want more advanced lab environments.
Can I Use EVE-NG on a Laptop?
Yes, depending on the laptop's hardware and virtualization setup. EVE-NG requires appropriate hardware virtualization and resources for the topology you plan to build.
What Should I Practice First?
Start with IPv4 addressing, subnetting, switching, VLANs, trunking, routing, DHCP, OSPF, and troubleshooting. Then combine these concepts into complete network projects.
Final Takeaway
Your first networking lab doesn't need to be expensive. Before buying expensive equipment, look around your home. An old computer you already have may be enough to start.
Turn it on. Build a network. Break it. Fix it. Learn from it.
That's how a forgotten laptop can become the foundation of your networking career.